 Loading... Please wait...
Categories
Our Newsletter
Current Top Sellers
-
1
-
2

-
3
-
4
-
5


- Home
- Assembly & Care
- K-9 Kondo Assembly Instructions
K-9 Kondo Assembly Instructions
Click here for printable K-9 Kondo assembly instructions without figure graphics »
REQUIRED TOOLS |
RECOMMENDED TOOLS |
PARTS |
| Phillips head screwdriver | Electric drill | 1 locking pin |
| Slotted screwdriver | Electric saber saw with blade | 2 door and cowl assembly |
| Crescent wrench | 1/4- and 3/8-inch nut driver | 2 sun deck brackets |
| Hand saw | 3/16-inch drill bit | 1 barrel adapter plate |
| 3/16-inch drill bit | Phillips head screw bit | 1 vent cover |
| Hole saw | Slotted screw bit | 2 leg brackets |
| 3/8-inch drill bit | 3/8-inch drill bit | 4 plastic legs |
| 1/16-inch drill bit | 1/16-inch drill bit | 2 leg braces |
| 2 brace supports | ||
| 4 chew guards |


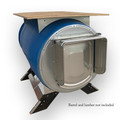
DO NOT USE BARRELS WHICH HAVE CONTAINED HARMFUL SUBSTANCES.
|
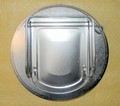
1. Stand the barrel on end. Make sure the end with the two removable plugs is on the bottom. 2. Locate the top end’s center and draw an 18" diameter circle (Fig. 2). Near the edge of the scribed circle drill one 3/8" or larger hole. 3. Insert the saw blade through the 3/8" hole and cut the 18" circle. Remove the waste from the barrel. 4. Attach the cowl/dog door assembly to the adapter plate with ten #10 x 32 x 1/4" machine bolts, lock washers, and nuts. Ensure that the dog door flap swings freely without striking the adapter plate before fully tightening. Place the adapter plate/dog door assembly to the side for the time being. 5. Place the metal leg bracket on top of the plastic legs as shown in Fig. 3. Align the top holes of the plastic leg with those of the leg bracket. Fasten the metal leg brackets and leg braces to the plastic leg stands with the 10 x 32 x 1 1/4" bolts, nuts, and lock washers as shown in Fig. 3. Using 4 1/2 screws, attach the four metal chew guards as shown in Fig. 5. 6. Place the leg stand on a flat level surface. A work surface at waist height will make assembly much more convenient. 7. Center the barrel on the leg stand as shown in Fig. 3. IMPORTANT NOTICE: Ensure that the barrel is attached correctly to the stand. The stand should rest slightly forward of the barrel’s horizontal center. If it is placed too far rearward, it will rock when the canine enters and exits the Kondo. Failure to attach it properly will cause the stand to eventually fail as a result of metal fatigue. 8. Adjust the barrel so that the barrel’s seam is level with the work surface as shown in Fig. 3. 9. Mark upon the barrel the location of the holes on each leg bracket for attaching the barrel. Drill one 3/16" hole at the location of each mark. (Helpful hint: Place a light inside the barrel near the point to be drilled. The light will show you where to drill and eliminate the need to mark it.) 10. Attach the barrel to the leg stand by inserting, from the inside of the barrel, one #10 x 32 x 1/2 bolt through each hole and leg bracket. Attach the lock washers and machine nuts and tighten firmly. Place the brace support on the center of the outside surface of the brace ensuring that the bend faces inward as shown in Fig. 5. With the support centered and flush with the brace, raise the support so the bend makes full contact with the barrel. Mark the location of the attachment holes upon the brace and drill one 3/16" hole at each mark. Attach the support with two 1/4" bolts, lock washers, and nuts. Finger tighten only. With the top of the support flush with the barrel, drill one 3/16" hole at the location of each mounting hole. Attach the support’s top with two 3/8" bolts, lock washers, and nuts. Ensure that the bolts are inserted from the inside of the barrel. Firmly tighten all bolts. Attach the chew guards with screws as shown in Fig. 5.
|
    |

11. Center the vent cover at the top edge as shown in Fig. 3. Mark the outline of the vent cover and cut the ventilation hole smaller than the size of the cover. An area of at least six square inches is required for adequate winter ventilation. Additional ventilation may be necessary for large dogs. Attach the vent cover with two #8 x 1/4" screws and lock washers. Cut and install a piece of a furnace filter between the vent cover and barrel if blowing snow occurs in your area.
COMPLETE THE FOLLOWING IF THE DOGHOUSE SUN DECK IS INSTALLED
a) Obtain one piece of exterior-grade plywood that measures at least 2' x 3' x 1/2" minimum (5/8" or 3/4" is better). The wider the deck the more shade the doghouse will receive. Remember that the leg stand must be as wide as the plywood deck. Be sure to round the deck’s corners.
b) Draw a centerline lengthwise on the plywood. Draw two lines from side to side 6" from each end. See Fig. 4. Place the deck brackets facing each other centered on the centerline. See Fig. 4.
c) Mark the location of the deck bracket holes on the plywood. Drill through the plywood with a 3/16" bit at each mark. Attach the deck brackets to the plywood with four #10 x 32 x 3/4" machine bolts.
IMPORTANT NOTICE: If additional ventilation is desired, holes should now be placed on the top of the barrel. If the K-9 Kondo is used as a carrier, ensure that a minimum of 144 square inches in vent area is provided under the deck. Two-inch hole saw works well for cutting vent holes. Make certain that added vent holes are covered by the sun deck.
d) Center the sun deck on the top of the barrel and mark the locations for drilling the holes. Drill one 3/16" hole through the barrel at the location of each deck bracket hole.
e) Attach the sun deck to the barrel using four #10 x 32 x 1/2" bolts, lock washers, and nuts. Make certain that the bolts are inserted from inside the barrel.
12. Drill 3/8" to ¾" drainage holes spaced 2" to 4" apart in the underside of the barrel. Several holes should be placed near the front.
13. Align the adapter plate’s 3 and 9 o’clock holes with the barrel’s seams and attach with twelve #8 x 1/4" screws.
14. Make sure that your canine’s standing shoulder height is not above the top of the rain cowl. Raise the Kondo’s base to be slightly above, or equal to, the height of your dog’s back above the shoulder.
Additional Recommendations
 A. Install plenty of bedding frequently to the K-9 Kondo and add to it. Change your dog’s bedding at least once every ten days. Your dog will compress and build his own nest. Prairie or marsh hay is the best bedding to use. Straw and wood shavings are poor alternatives as they tend to stick to the dog, retain moisture, and do not nest well. Do not use dog pillows or blankets as the ticking compresses in the center and is pushed to the edge of the pillowcase.
B. Lock the animal door open for the canine to enter and exit at will or force your canine through the door several times so that it may learn how the door flap operates. The K-9 Kondo works well with dogs on chain or cable. Plastic covered chain or cable will help protect the zinc plating from chain abrasion.
C. Clean the barrel-style doghouse often with soap and water. High-pressure car wash systems work well. Water will not harm any part of the K-9 Kondo.
D. Ventilate your K-9 Kondo doghouse to fit your dog’s needs. NEVER LEAVE DOGS LOCKED IN ANY DOG CARRIER, EVEN A K-9 KONDO, IN DIRECT SUN OR IN ENCLOSED AREAS SUCH AS PICKUP TOPPER, COVERED BEDS, OR VANS.
E. Remember that doghouse ventilation is as important in winter as it is in summer. Your dog can’t stay warm in wet bedding as a result of condensation. Adequate doghouse ventilation will prevent condensation and keep your dog warm. DRY BEDDING IS THE BEST FORM OF INSULATION FOR YOUR DOG.
F. Application of linseed oil to the sun deck will prolong the life of the plywood. Apply several times each year.
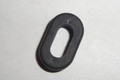
APPLY SILICONE GREASE BETWEEN THE HINGE PIN AND RUBBER BUSHING SEVERAL TIMES EACH YEAR. REPEAT THIS STEP MORE OFTEN IF THE DOOR RECEIVES HEAVY USE.
The rubber kennel door bushings can be consumed much like car tires. Please note, the bushings are not covered under the manufacturer warranty. Replacement bushings sell in lots of 10 for $8.00. U.S. Postal Service is used for shipment. Delivery when using USPS is not guaranteed. Visa/MasterCard are accepted for telephone orders. For orders placed by mail, send check or money order for the amount to:
K-9 Kondo Inc.
607 J Street
Stapleton, NE 69163
Make sure you include a return address. Orders received are mailed the next day. Lubricate them often with silicone lubricant to increase serviceability.