 Loading... Please wait...
Categories
Our Newsletter
Current Top Sellers
-
1
-
2

-
3

-
4

-
5


- Home
- Assembly & Care
- Hound Heater Installation
Hound Heater Installation
|
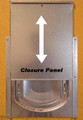
1. Drill two 1/16" holes through the wall support and heat shield and attach as shown in Fig. 1 using two enclosed self-tapping screws. 2. Pass the electrical cord through the 1 1/16" hole in the back wall as shown in Fig. 1. Make sure the cord is not kinked. (For Dog Den 1 & 3 pass the cord through grommet and insert grommet in the hole) 3. Attach the heater to the wall by inserting three 2" bolts from the inside through the heater and wall at the location of each "X." (Dog Den 1,2, & 3 require four 7/32" mounting holes drilled from inside out) Place the flat washer over the bolt's end and tighten the nut until heater is flush with the wall. Insert the bottom left bolt from the outside through the heater and attach with washer and nut. Cut bolt end flush with nut. Fig. 2 and 3. (Top of heater should be six inches below the top of wall for Dog Den 1,2, and Dog Den 3. Hole cover not used with Dog Den 1 & 3) 4. Connect to a GFI circuit only. 5. Refer to the manufacturer's instructions for heater operation. Low setting is best for use in Dog Den models.
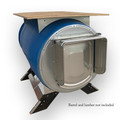
Additional Pet Heater InformationThe Hound Heater Pet House Furnace is powered by a special 150-watt heating element. Set thermostat on low setting only for use in Dog Den models. Your Hound Heater comes with a one-year manufacturer warranty. If you should experience any problems with your Hound Heater Pet House Furnace, contact: AKOMA Dog Products, LLC
|
|


